Raspberry Pi for SplashTiles - Android
Emteria can provide a stable, enterprise grade Android OS for your Raspberry Pi 4b. Emteria has free licenses available for small self managed installations, as well as low cost automatic provisioned solutions with full centrallized management for your larger installations.
Hardware
- Raspberry Pi 4b, 4GB or more RAM
- Case with heatsink and fan
- 16GB or larger uSD card
- USB Air mouse/keyboard for setup
- Video playback is limited to SD resolution
- WebGL applications are not supported
- Our Google Photos tile is not working
- Scheduling is supported, but live remote control is not supported
Setup Emteria account
These instructions will cover how to setup SplashTiles on Emteria OS using the unmanaged free "Starter" accounts. These give you the full Android OS but requires that you manually setup each device. If you have a larger installation we recommend using the Premium plan which allows for full automatic device provisioning (setup) and remote management. When using provisioning, you can select SplashTiles as an autoinstalled app in Kiosk mode via their web portal. This allows you to skip all the setup steps below (other than SD card and login).
- Create your Emteria account
- Down the SD card installer and burn your card
- Plug in your device and activate your license once it boots. Note you will need the USB air mouse and/or keyboard for setup.
Configure settings
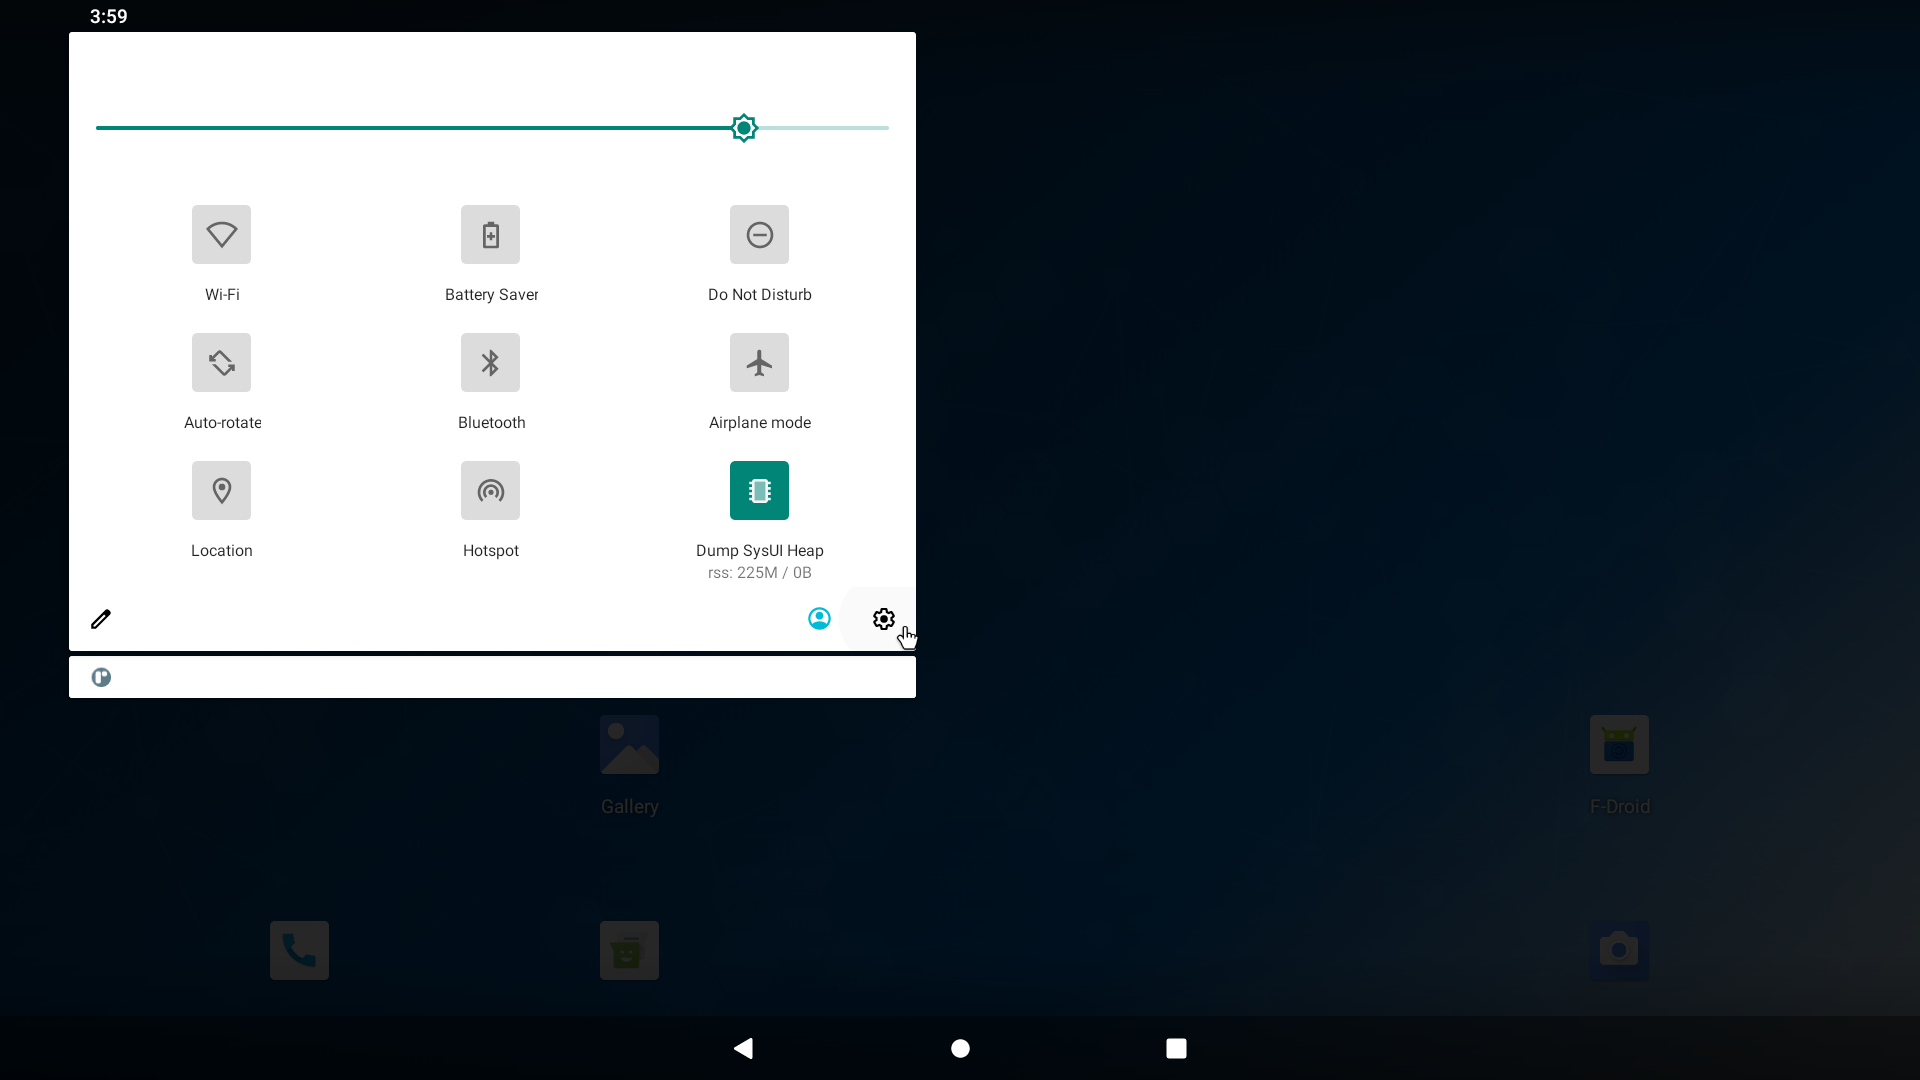
- Use your mouse to pull down the settings bar from the top. Select the Settings icon.

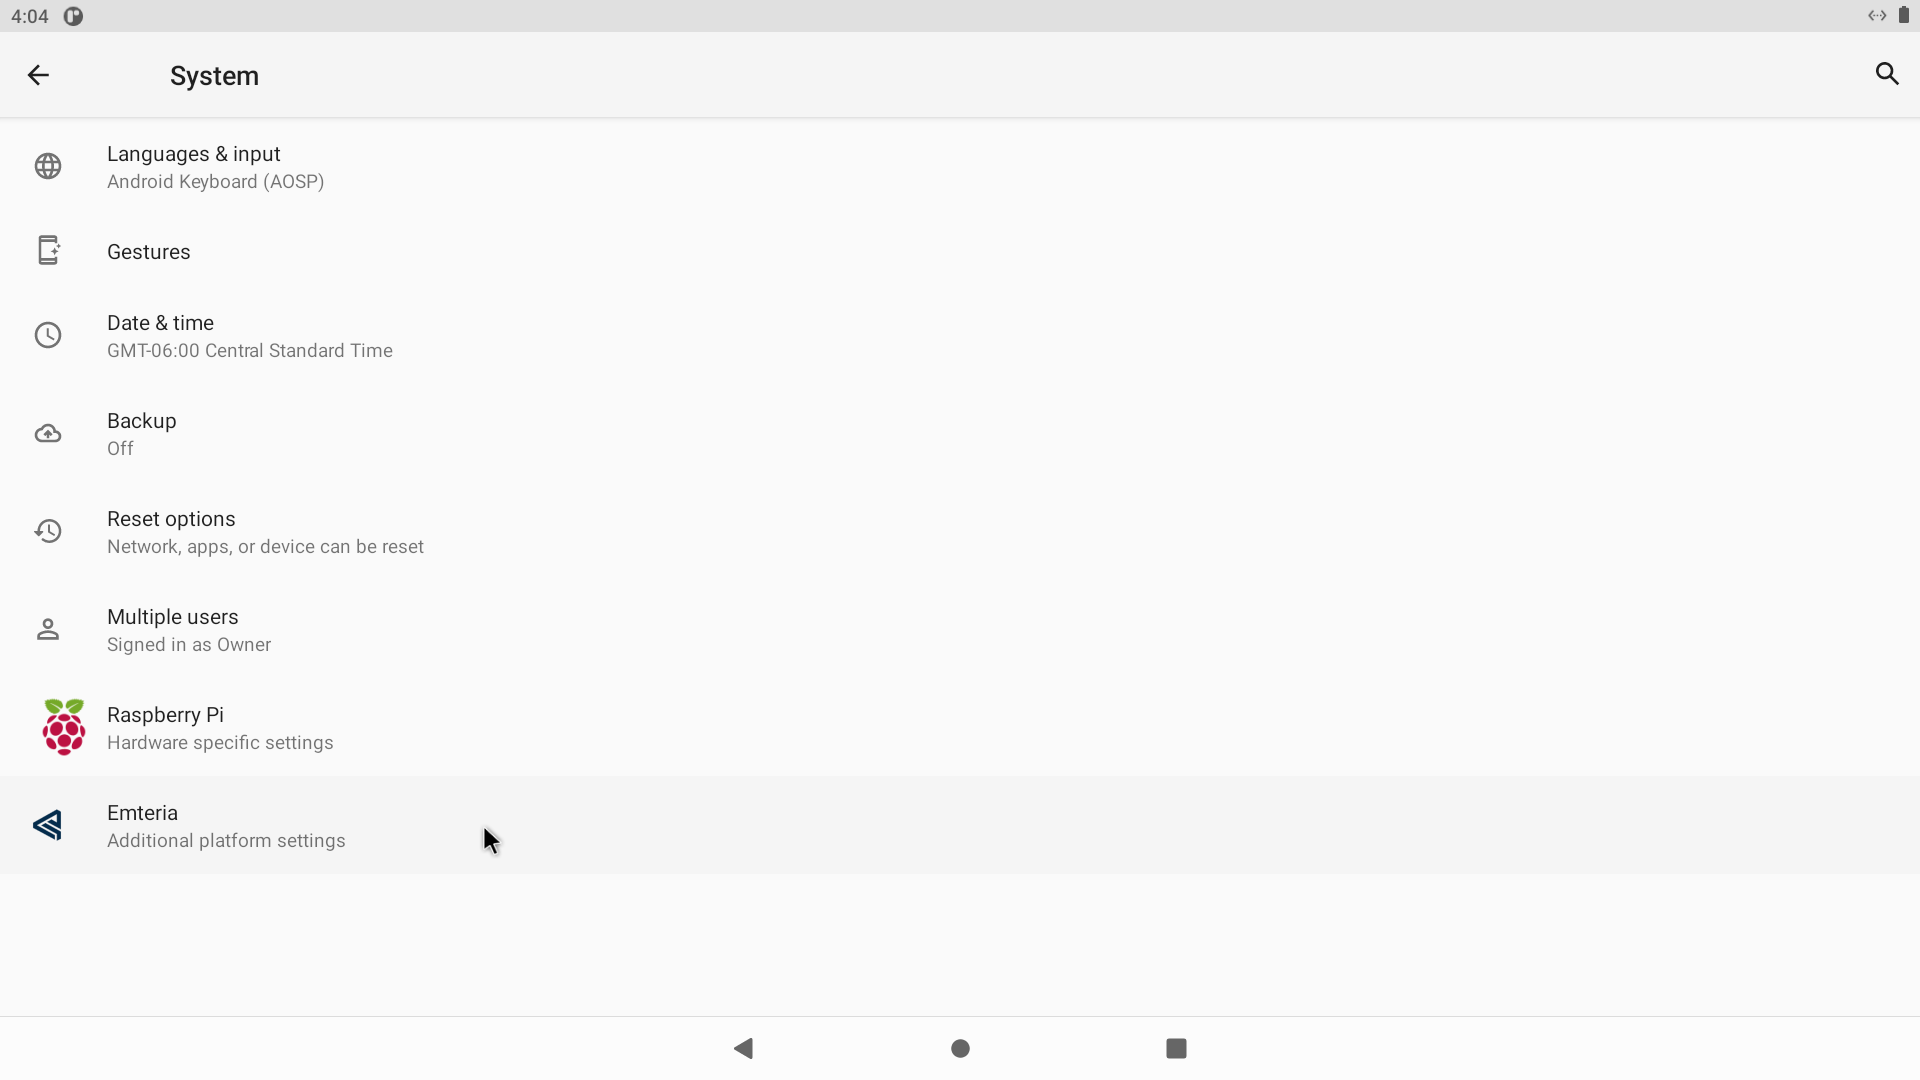
- Select System, then Emteria


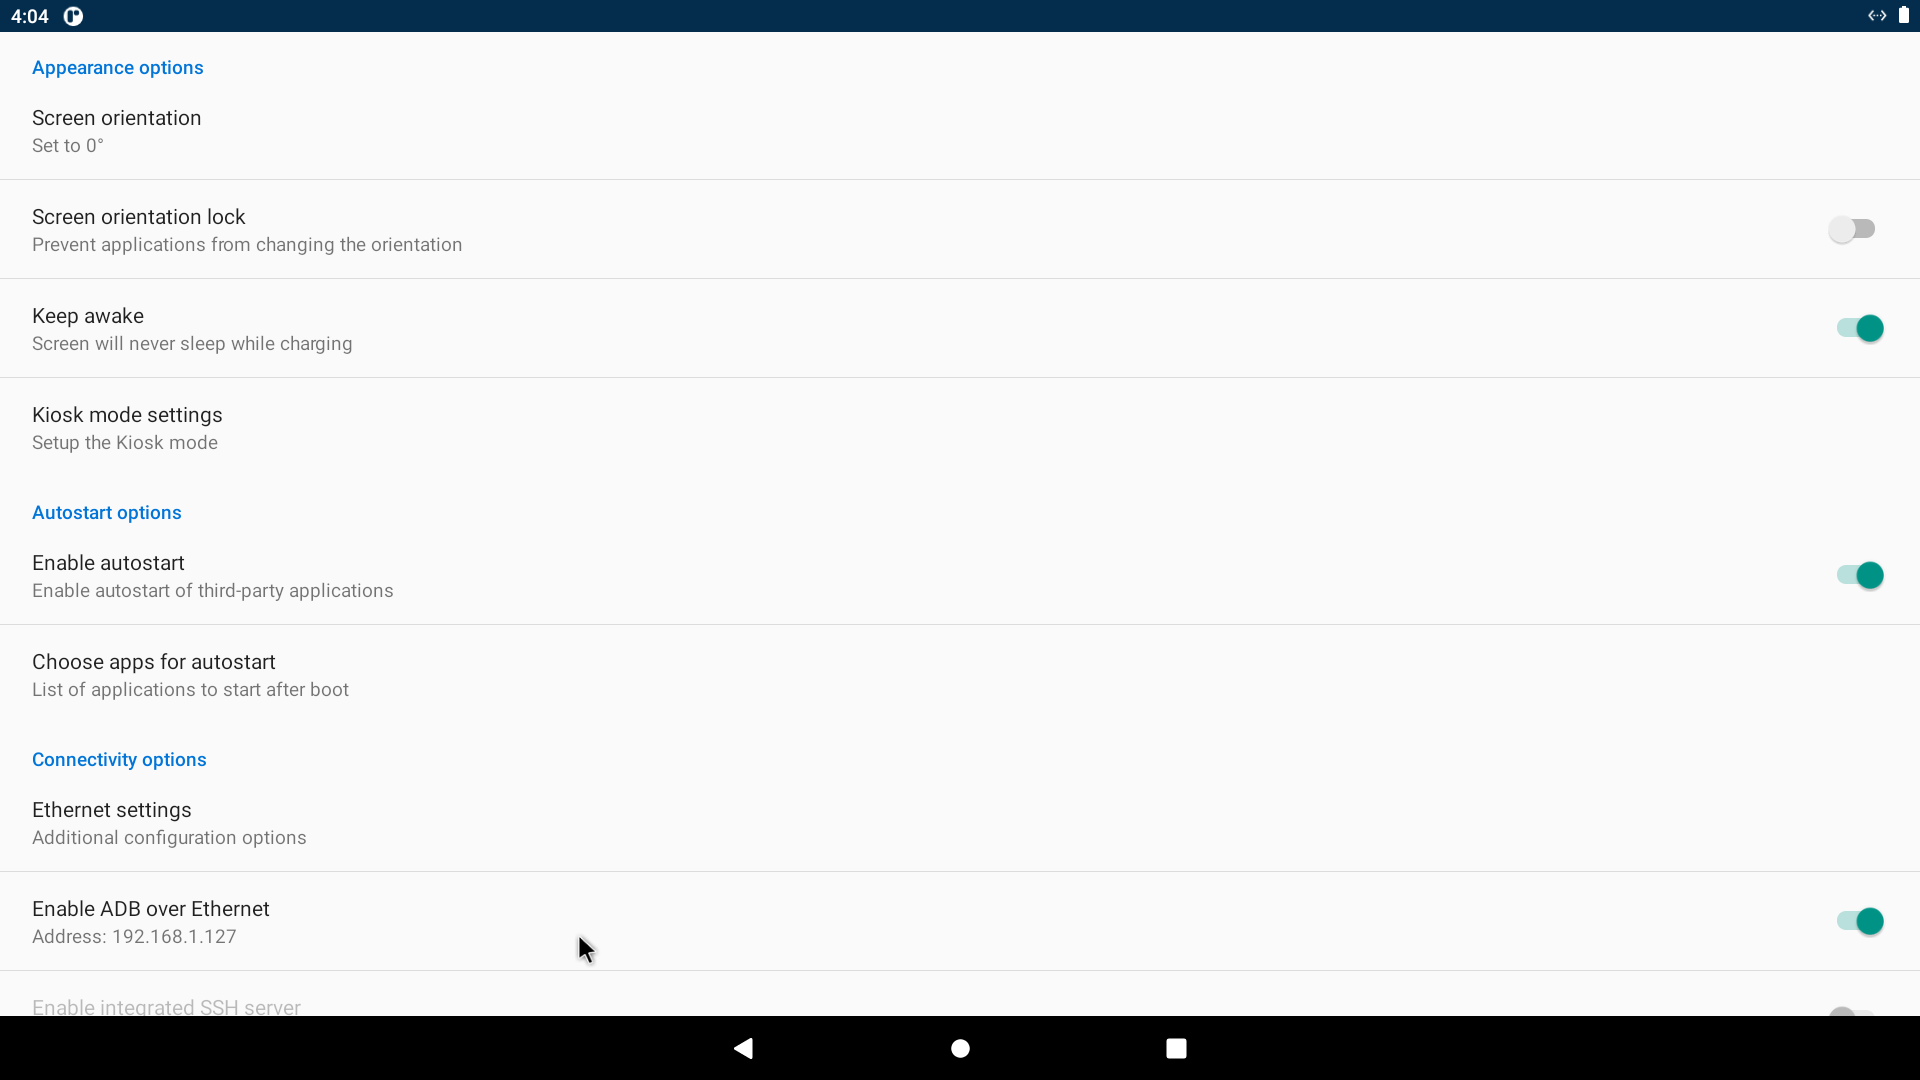
- If your screen is portrait mode, set the Screen orientation
- Enable Keep Awake
- Enable ADB over Ethernet. Note the IP address of this device
Install SplashTiles
Emteria does not connect to the Google Play store by default. The best way to install SplashTiles is by "sideloading" via ADB.- Setup ADB on your computer (Note USB drivers are not needed since we use network connections)
- Connect to your device using adb connect IP_ADDRESS
- Download the SplashTiles APK. Save to the directory you will run ADB from.
- Install SplashTiles adb install -r splashtiles.apk
- Start SplashTiles (from Settings->Applications) and follow the normal device setup
Kiosk mode
Kiosk mode will prevent unauthorized users from exiting the SplashTiles app or modifying your device settings. To enable Kiosk mode:- Select Settings->System->Emteria as above

- Select "Choose apps for autostart", select SplashTiles
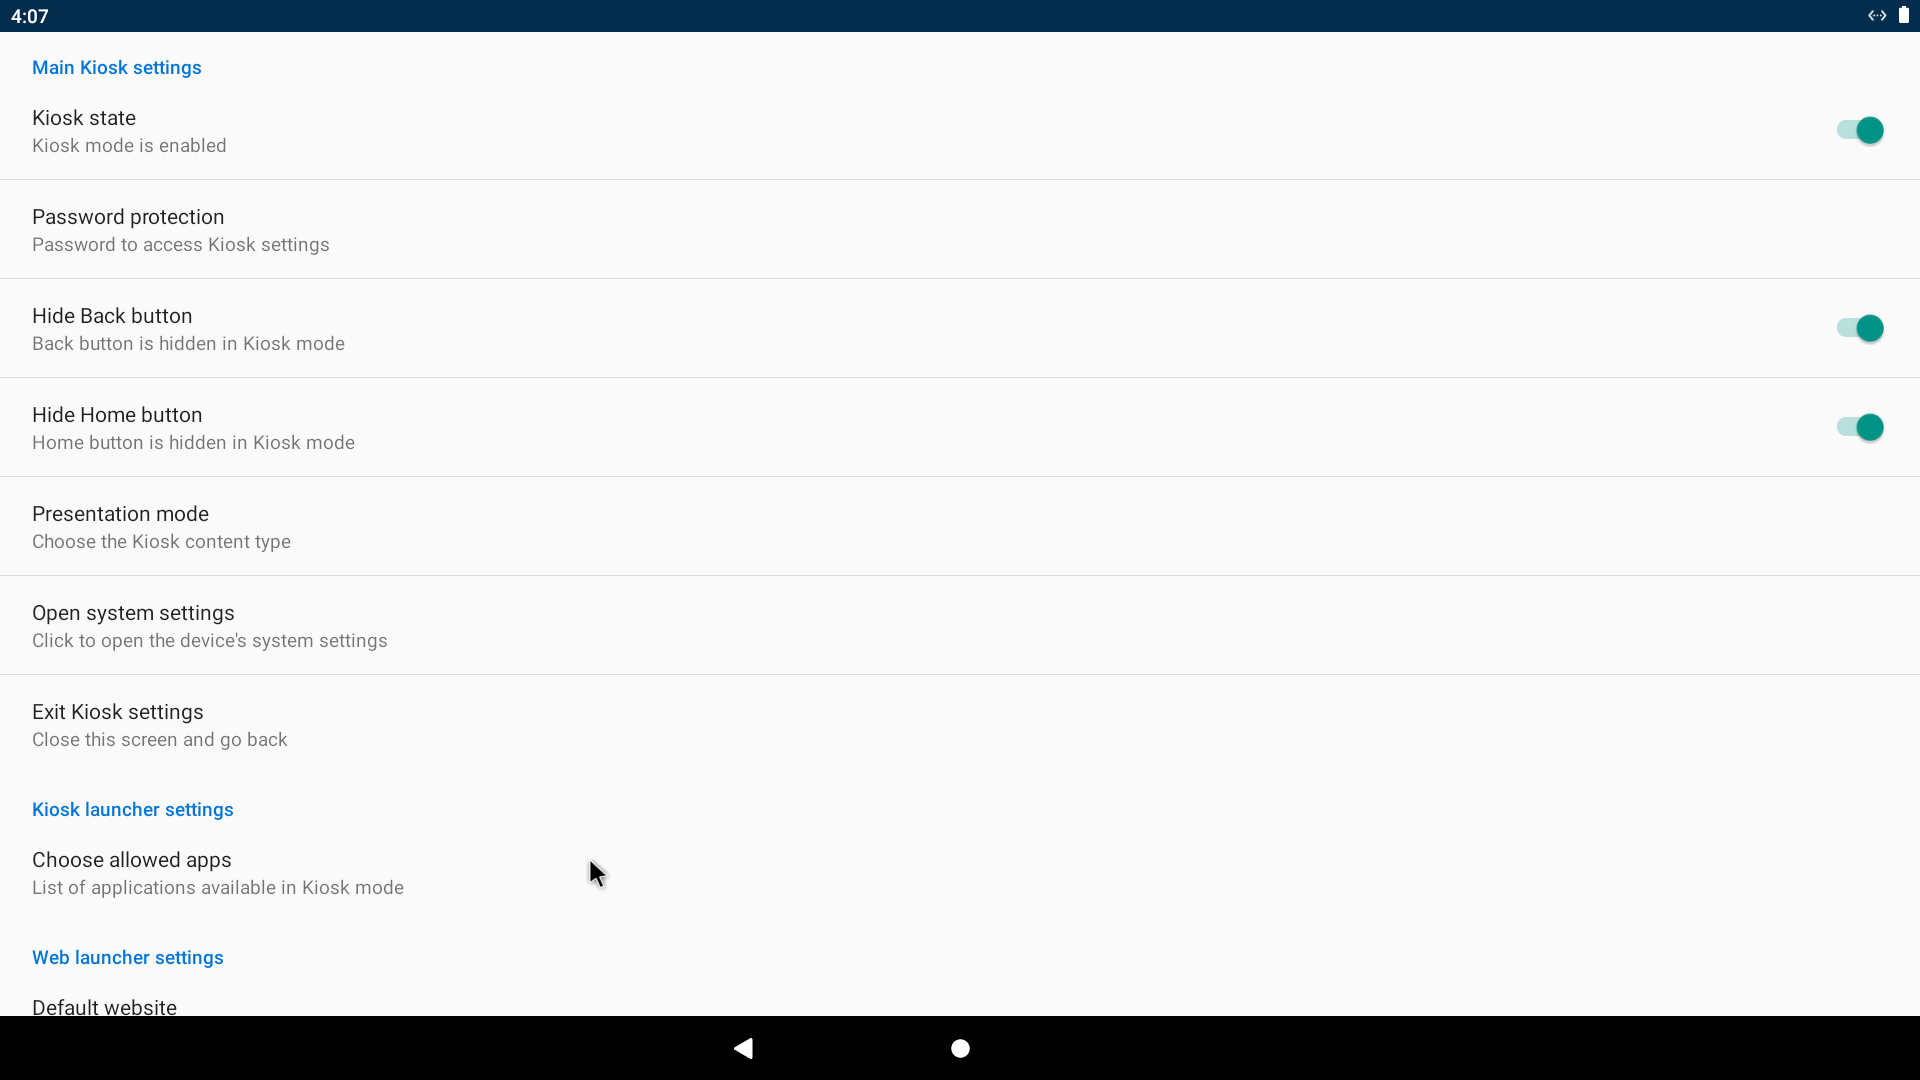
- Select "Kiosk Mode Settings"

- Set Enable Kiosk State
- Set Hide Back button and Home Button
- Set Choose Allowed Apps, select Splashtiles
- Set the Password Protection
- When finished, reboot and SplashTiles will autostart in Kiosk mode.